

Understanding the mobility of the future with robot cars
Welcome to a new blog series about robot cars. In the first part, we will learn the basics of it, so to speak, to help you decide which chassis, microcontroller and type of remote control is best for you.
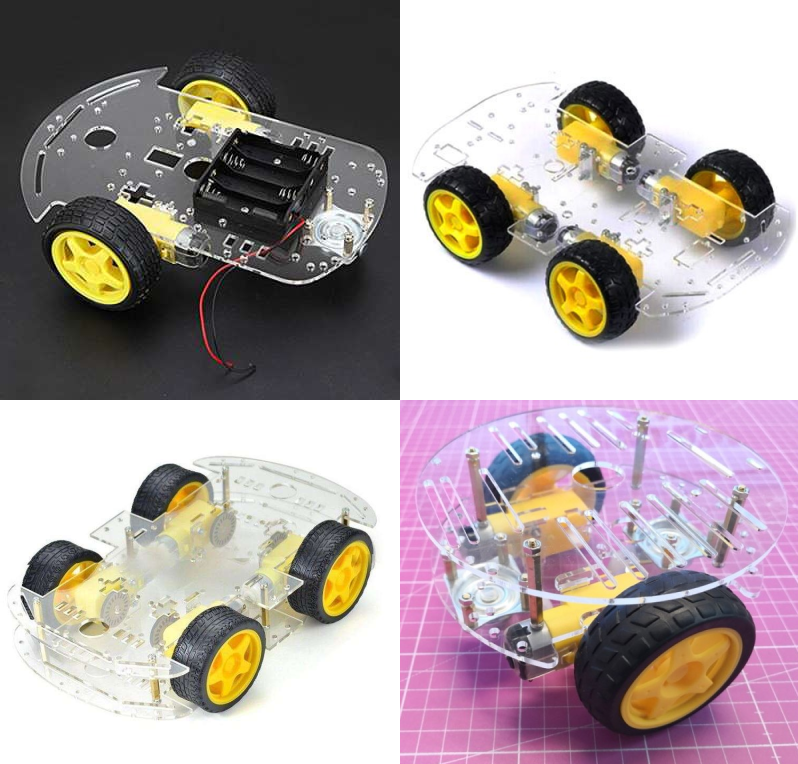
Two or four wheels - weighing the pros and cons for building RC cars for Arduino
Let's start with the chassis and look at the advantages and disadvantages of the inexpensive kits with two or four powered wheels. All of them have electric motors in common, so these alone are not a selection criterion. The two-wheeled robot cars are initially less expensive because they do not have the cost of two more electric motors and wheels. Instead, they have one or two support wheels, which give the RC cars great maneuverability. So if you want to "step up to the plate", this is the way to go. However, in this price range of DC motors, you can't expect them to run smoothly with high precision. Therefore, the straight running is not as good as with the four-wheeled variant. Especially when starting up the motors show a higher tracking accuracy, but cornering is only possible with significantly larger radii. Another advantage of the four-wheeled chassis is more space for batteries, microcontroller, possibly DC/DC converter and sensors.
The choice of microcontroller for building an RC car
The next question is about the microcontroller and the way it is programmed. For example, the greatest computing power on the small chassis has a micro computer of the type Raspberry Pi. Especially in terms of remote control, the types with built-in WiFi and Bluetooth offer advantages and you can even transmit images from a Raspberry Pi camera. Programming is done in the widely used Python programming language, but the system startup of the Linux-based Raspberry Pi OS takes about a minute. Another drawback of the Raspis (short for Raspberry Pi) is the need for a good 5V power supply. This requires a good DC/DC converter.
In connection with the topic of Bluetooth remote control, an example with Raspberry Pi and the Android APP BlueDot by Martin O'Hanlon (staff member of the Raspberry Pi Foundation) will be shown in a later episode.
Much faster is the system startup with a Micro Controller based on the ATmega 328, e.g. the Funduino Uno or Funduino Nano. About one second after power on you can start with the control inputs, no booting from microSD card, the program once uploaded is not forgotten. The input voltage can be between 5 and 9 volts. Programming is done in the Arduino IDE, a development environment similar to C/C++ (For further explanation see https://funduino.de/hardware-software). Therefore, we will first look at examples with the Funduino Uno R3, for which perfect motor controllers are available as so-called shields. These are simply plugged onto the Uno and so-called libraries help us with the programming.
Excursus: What is a motor controller/motor driver?
Due to the very limited current at the outputs of the micro controllers, larger consumers - and this includes all kinds of electric motors and relays - require an external power supply and an electronic circuit that converts the control signal of the micro controller. However, the requirements for this integrated circuit are even higher: On the one hand, it should allow a variable speed of the motor, on the other hand, we also want to be able to change the direction of rotation of the motor by reversing the polarity.
Using the IC L293D as an example, we will now explain how it works. Basically this DIP component with sixteen "legs"/connections is sufficient as a motor controller for two electric motors.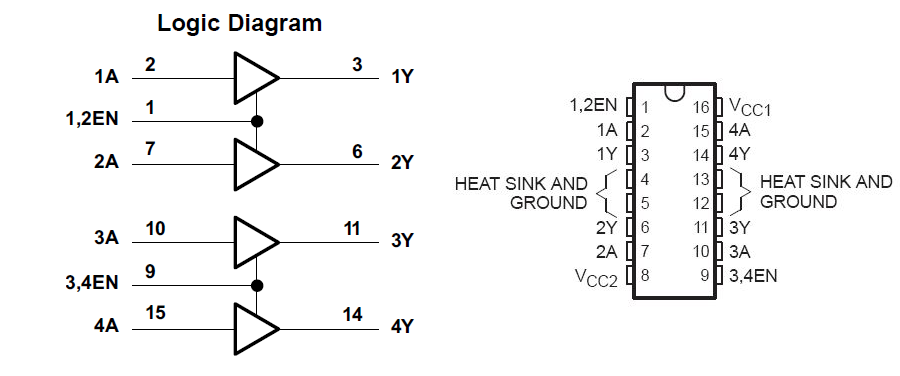
The voltage supply of the IC is at the connections VCC1 and Ground. We can tap this voltage at the micro controller. The voltage supply of the motors is done via VCC2 and Ground. Here we connect the battery(ies) (e.g. 6 or 9 volts). For bigger motors the IC has to be cooled, for the small yellow ones from the kit not.
The one motor we connect to 1Y and 2Y, the corresponding control lines to the MCU (Micro Controller Unit) are 1A, 2A and 1,2EN.
Reversing the polarity of the motors to change the driving direction is basically done with a so called H-circuit. We implement this with our micro controller by placing two output pins (these go to 1A and 1B) at either HIGH or LOW.
The speed change is done as in example no. 04 - pulsating LED with pulse width modulation (PWM), i.e. the very fast switching on and off of the voltage. Therefore we need for the connection 1,2EN ("Enable") a PWM capable output at the MCU (these are the pins with the tilde ~).
For the second motor, the connections 3A, 4A and 3,4EN are connected to pins of the MCU.
The right picture (Logic Diagram) explains how the IC works. We can see the four amplifiers that give the input signals 1A to 4A respectively with the battery voltage to the outputs 1Y to 4Y. However, this is only done if the PWM inputs 1,2EN and 3,4EN are also switched HIGH.
Two of these ICs L293D are installed on the Motor Shield V1, so that up to four motors can be connected here.
To avoid using too many pins, there is a so-called shift register (SN74HC595) in the middle of the Motor Shield V1. To explain how it works would go beyond the scope of this article. Fortunately, the colleagues of the New York company Adafruit did most of the programming work for us and provided a library to control the motors easily.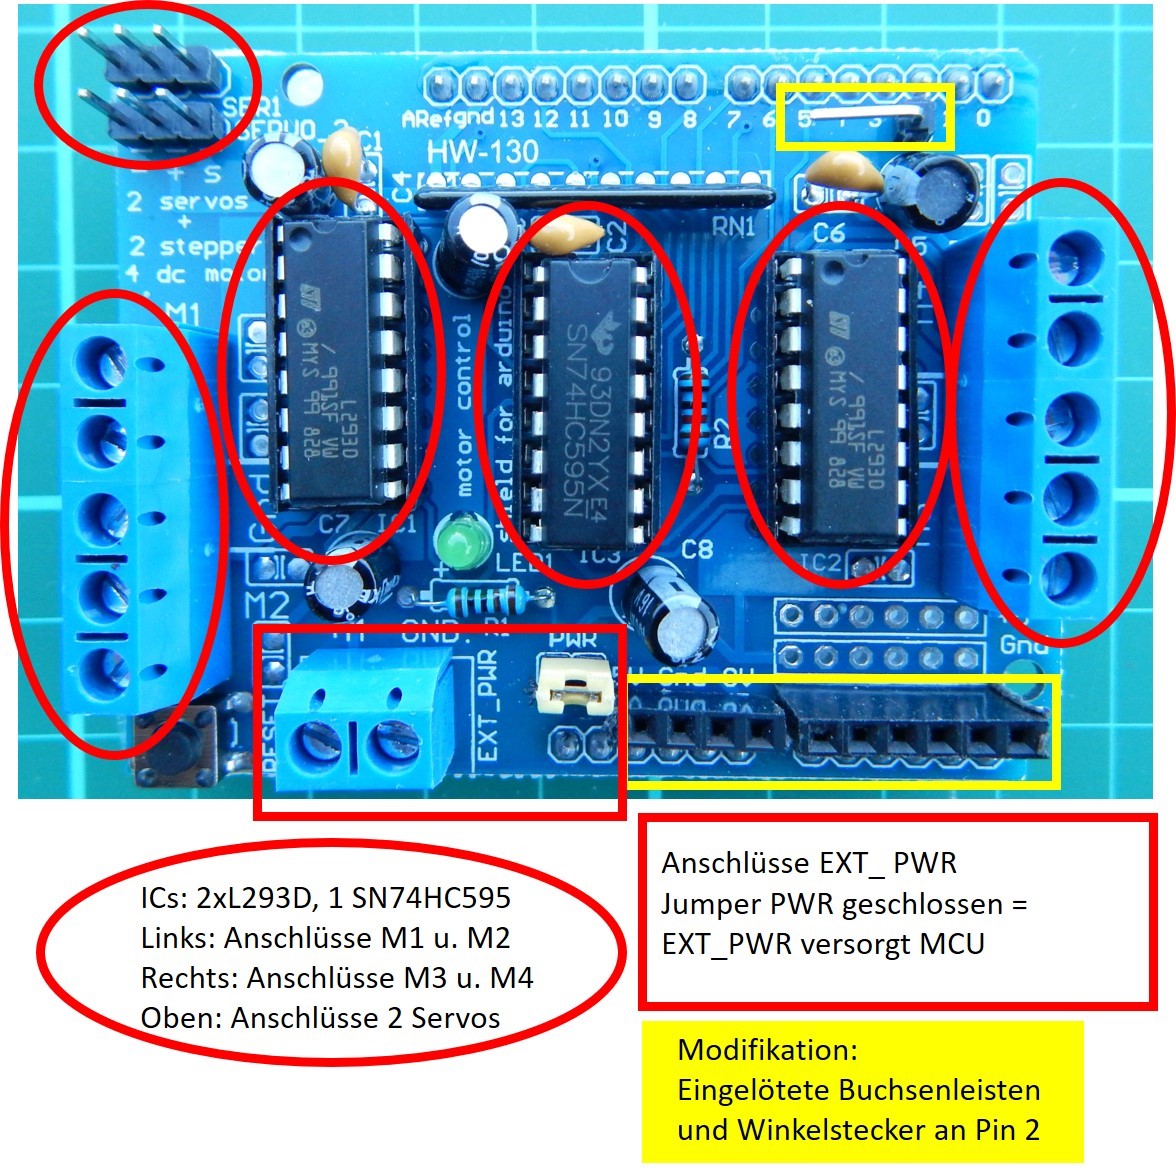
Picture Motor Shield V1 with modification:
Soldered socket connectors (female connectors) for connecting additional equipment
The Motor Shield V2 can also control up to four motors and uses a similar IC, but for the connection of the control lines the so-called I2C bus with the connections SDA (=Serial Data) at the analog input A4 and SCL (=Serial Clock) at A5. Adafruit has also developed and provided a suitable program library for this purpose.
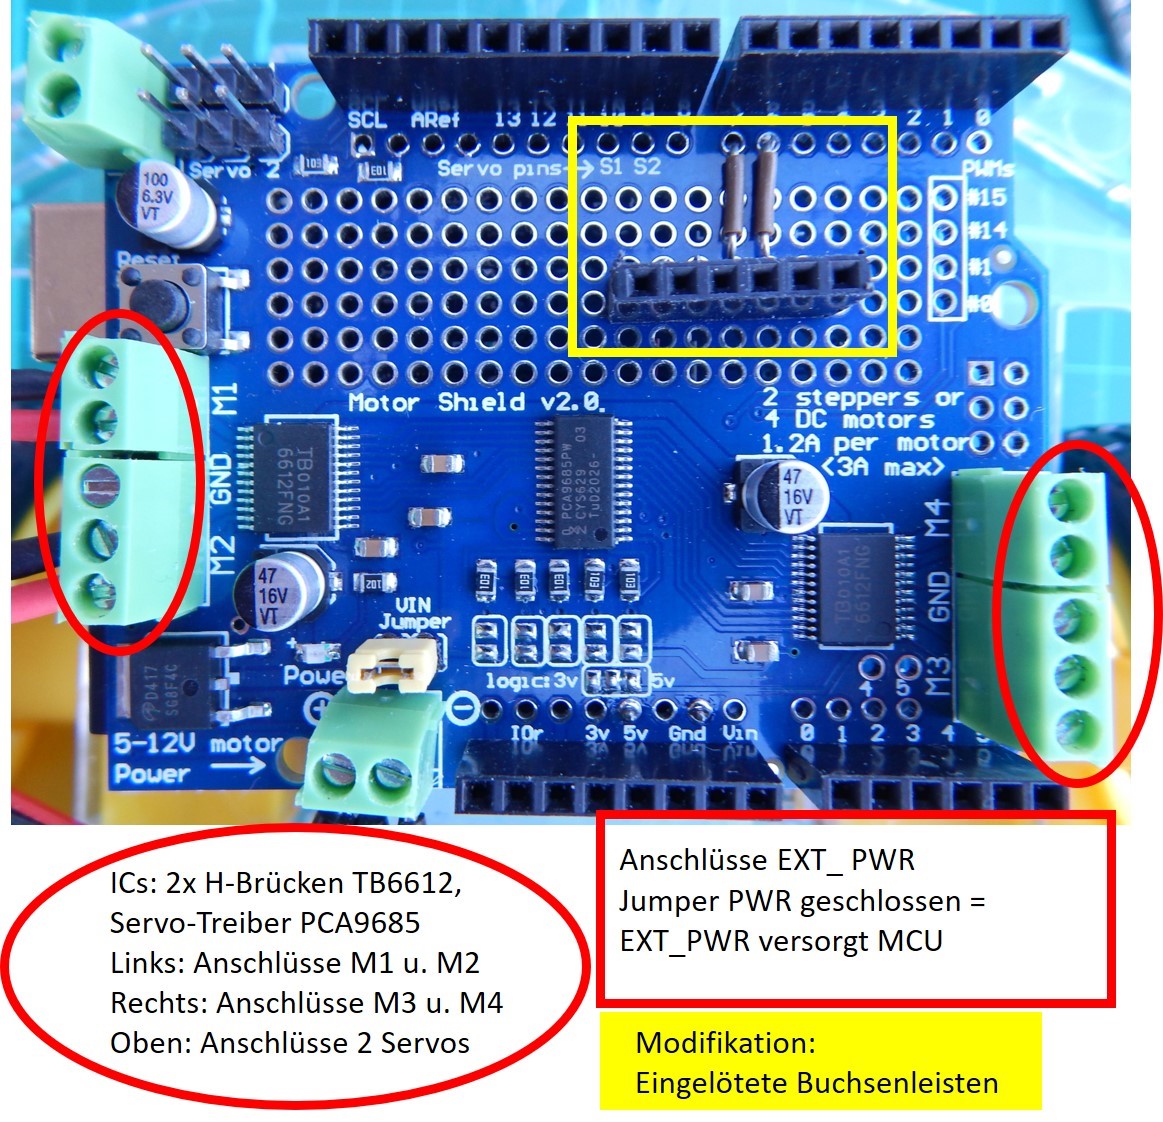
Picture Motor Shield V2 with modification:
Soldered socket connectors (female connectors) for connection of additional equipment
On both Motor Shields additional female connectors are soldered in order to connect Bluetooth or 433 MHz transmitters/receivers or sensors later. More about this in one of the following blog posts.
Power supply and control for an RC Car for Arduino microcontroller
If we want our robot car to drive independently, we have to disconnect it from the USB port of the PC. This means that the power supply will be lost as well. From now on, the command center (MCU) and electric motors will be powered by batteries or rechargeable batteries. Here, the motors are by far the larger consumers. The battery holder that comes with most kits is for four Mignon (AA) batteries, i.e. 6 volts for MCU and motors. If you want to use rechargeable batteries, you should use either six Mignon (AA) batteries or two 18650 lithium-ion batteries because of the lower voltage.
For control, in the next episodes we will first learn about remote controllers with infrared remote control, Bluetooth transceivers with smartphone APP or a second micro controller also with BT transceiver HC-05, and radio remote controllers with 433Mhz and 2.4 GHz. The blog series will conclude with aspects of autonomous driving, primarily obstacle detection. See you soon.
")


