Note: An active buzzer is required for this program (explanation follows later), attention must be paid to polarity. No series resistor is needed at the buzzer (speaker).
In this blog post we want to make a buzzer and an LED light up and sound respectively using a Raspberry Pi microcontroller. This program is popular in schools for showing how simple output signals can be utilized using a Raspberry Pi with simple components.
Before we get into what the difference is between an active and passive speaker, let's first look at the schematic and program code.
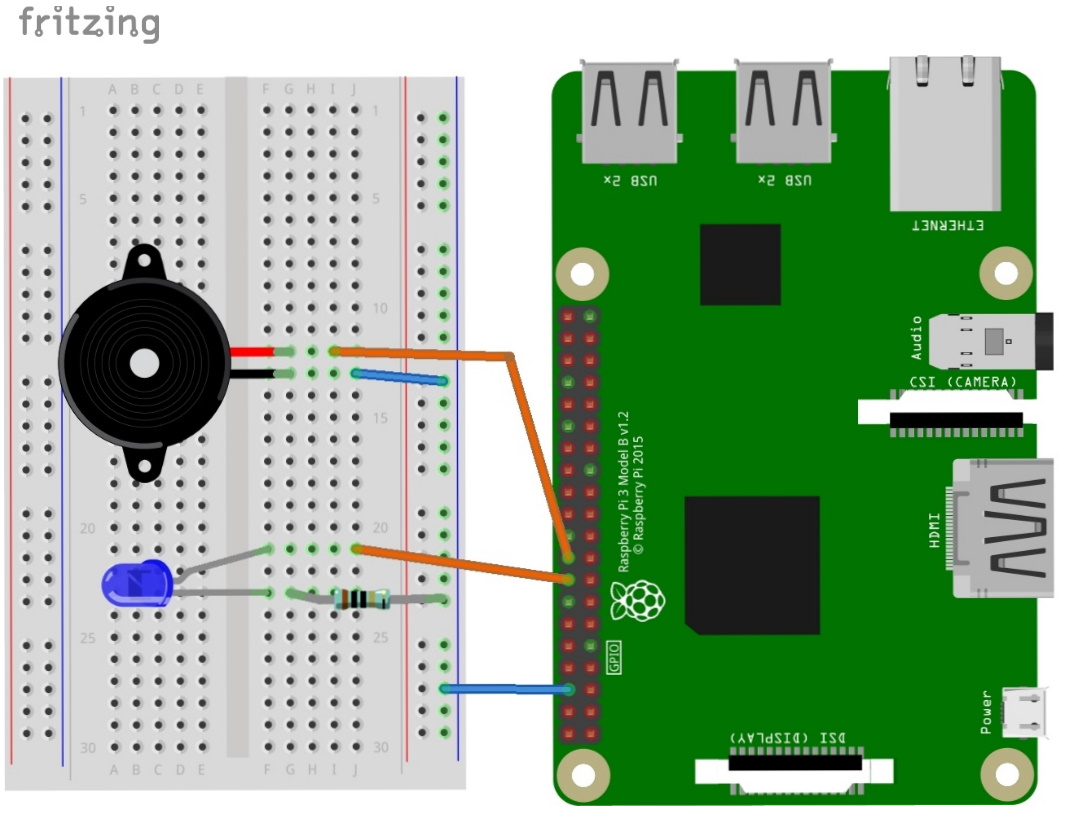
The schematic: Connecting buzzer and LED to the Raspberry Pi
The source code: Connecting Buzzer and LED to the Raspberry Pi
# This time we also use the first program section. Here variables are entered. This means that there is a number behind a letter or a word. In our case, the LED is connected to pin 23 and the piezo speaker to pin 4. To avoid confusing the two pins later, we simply rename pin 23 and pin 24.
# We start with importing the program modules
import RPI.GPIO as GPIO
import time
GPIO.setmode(GPIO.BCM) # We set the mode to BCM
LED=23; # The word "LED" now stands for the number "23".
Beeps=24; # The word "beep" now stands for the number "24".
GPIO.setup(LED,GPIO.OUT) # Pin "LED" (pin 23) is an output.
GPIO.setup(Pieps,GPIO.OUT) # Pin "Pieps" (Pin 24) is an output
# Here starts the loop
try:
while True: # While loop so that the program runs continuously
GPIO.output(LED,GPIO.HIGH) # Turns on the LED.
GPIO.output(Pieps,GPIO.HIGH) # Turns on the piezo speaker.
time.sleep(1) # Wait 1 second
GPIO.output(LED,GPIO.LOW) # Turns off the LED.
GPIO.output(Pieps,GPIO.LOW) # Turns off the piezo speaker.
time.sleep(1)
# Here at the end the program jumps to the start of the while loop. So it's about to beep and light up again. If you increase or decrease the pause (time.sleep), it will beep and light faster or slower.
except KeyboardInterrupt: # With CTRL+C we interrupt the program
print ("Finished") # Write "Finished" in the shell window
GPIO.cleanup() # Exit the program
Difference active and passive buzzer
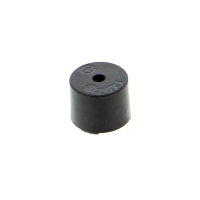
The active buzzer has a built-in oscillator, which produces a buzzing sound when the voltage of 3.3V or 5V is applied. Due to the design, you have to pay attention to the polarity of the buzzer. At delivery, these buzzers usually have a small sticker with the plus sign and "REMOVE SEAL AFTER WASHING" sticker. There is also a plus + again on the body of the part itself. You have to look twice to see the longer leg. Or you take a small breakout board; here the contacts are marked with S (stands for signal) and - (minus, ground).
You can test the buzzer with a simple program like for the blinking LED, where the (almost) arbitrary pin is switched to HIGH for one second and to LOW for one second.
The passive buzzer has no built-in oscillator, so the Raspberry Pi has to take over this function. If you try the above program on a passive buzzer, you will hear a soft "click" sound every second.
However, if you shorten the pause time extremely (sleep(0.001) or sleep(0.002)) and repeat the on/off for a certain duration, you can hear a sound whose frequency we can easily calculate: one millisecond each of HIGH or LOW means (neglecting the execution time of the other commands) about 500 cycles on/off per second, i.e. about 500Hz.
If you want to emit a short warning tone, you should use an active buzzer, which is switched on and off like an LED. Attention should be paid to the polarity.
If you want to program a two-tone siren (which can be heard more clearly) or a short recognition melody (jingle), you should use a passive buzzer or a small loudspeaker.


