

Hardware and Software for the Raspberry Pi
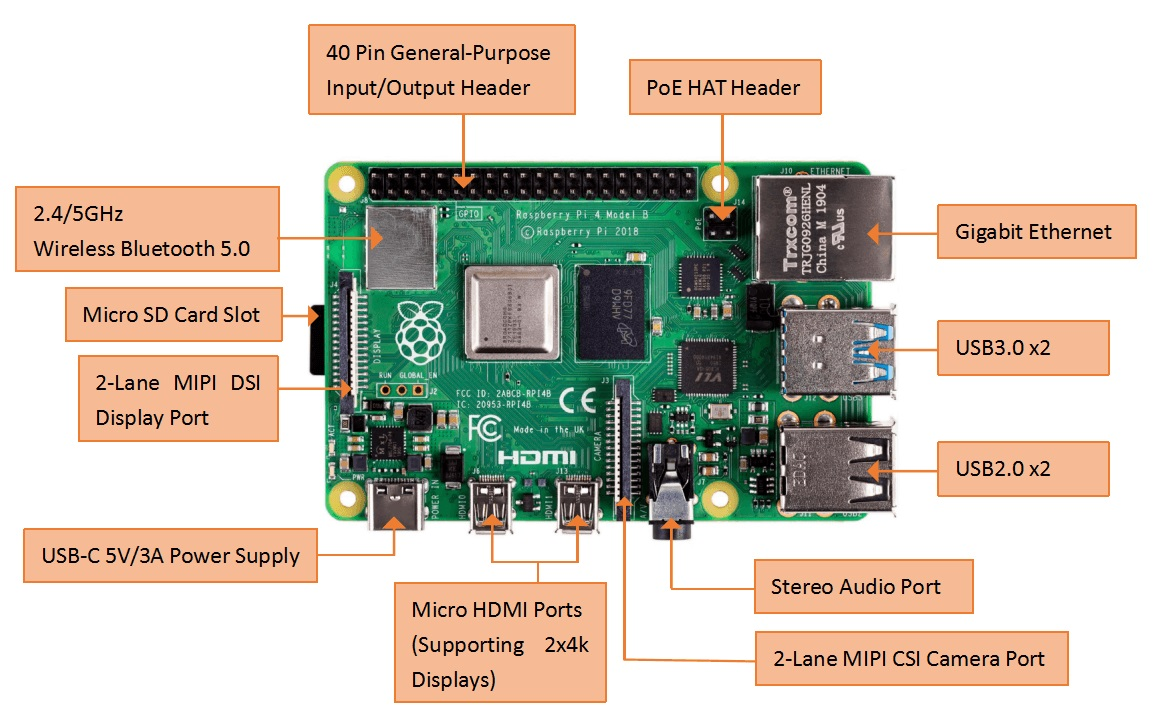
Hardware for the Raspberry Pi
Basic accessories for the Raspberry Pi
In addition to sensors and actuators, you need plug-in cables in connection with a breadboard as a basis for fast and flexible experimental setups. This saves time-consuming soldering work. Furthermore light emitting diodes are very suitable to check the signal output of the board.
The Breadboard
A breadboard is a good tool to build circuits without soldering. In a breadboard there are always several contacts connected in a row. Therefore, many cables can be connected to each other at these points without soldering or screwing.
The following picture shows in color which contacts are connected to each other.
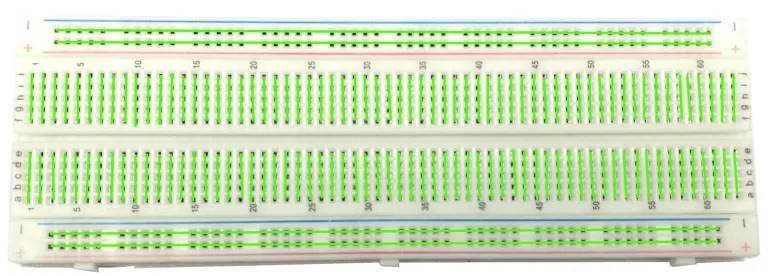
Standard plug-in board for Raspberry Pi and microcontroller.
The green lines in the picture show the course of the traces.
For a good connection of the Raspberry Pi to the breadboard there are so called T-Cobbler with a ribbon cable leading out all 40 pins.

Light emitting diode (LED) for the Raspberry Pi
LEDs are a very fast way to test the results of a project. Therefore they are useful for almost all Arduino projects. You can read a lot about LEDs on the net. Here are only the most important infos.

- The current can only flow through the LED in one direction. Therefore it must be connected correctly. A LED has a longer and a shorter contact. The longer contact is + and the shorter one is -.
- An LED is designed for a certain voltage. If this voltage is undershot, the LED lights up less brightly or it remains off. However, if the voltage is exceeded, the LED burns out very quickly and becomes very hot at the contacts (CAUTION!).
- Typical voltage values according to LED colors: Blue:3.1V, White:3.3V, Green:3.7V, Yellow:2.2V, Red:2.1V The voltage at the board's Digital Ports is 5V. When connected directly to these ports, each LED gives up the ghost quite fast. Therefore a resistor must be connected into the circuit. In the internet you can find very good help under the search term "Widerstandsrechner LED".
- Non-binding recommendation for resistors at the following LEDs (When connected to the 5V pins of the microcontroller board.
| LED | White | Red | Yellow | Green | Blue | Infrared (IR) |
| Resistance | 100 Ohm | 200 Ohm | 200 Ohm | 100 Ohm | 100 Ohm | 100 Ohm |
Plug-in cable or jumper wire for the Raspberry Pi
The jumper wires are available in different versions, mostly in 10cm or 20cm length with plugs as well as with sockets. Here mm=male-male=plug on both sides, mf=male-female=plug on one side, socket on the other side, and ff=female-female= with sockets on both sides.

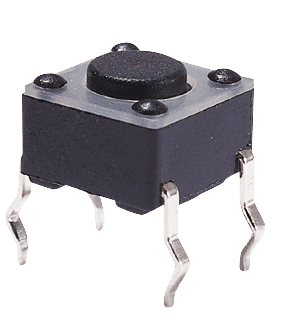
Pushbuttons and switches for the Raspberry Pi
The first and simplest sensor is the button, a spring-loaded switch that reopens the electrical contact when released.
Software for the Raspberry Pi
The operating system Raspberry Pi OS can be downloaded for free from the homepage of the Raspberry Pi Foundation. The 32-bit version is currently identical for all models. For writing to the µSD card (8 to 32 GB) on the PC, the program Imager is recommended, which can also be downloaded from the Foundation's homepage.
Installing the software

Starting up the Raspberry Pi
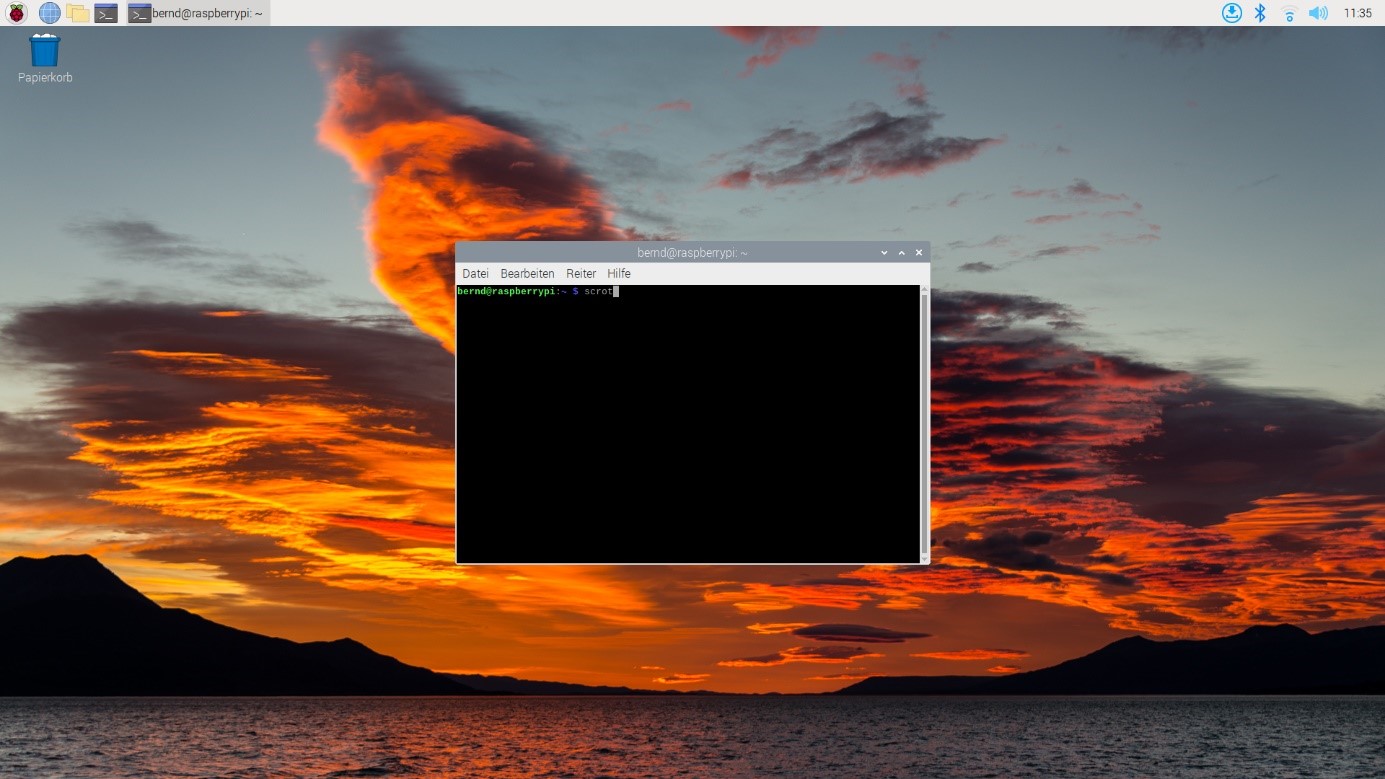
At the first startup the operating system is set up. Among other things, the access data for the home WLAN is entered. Since spring, the user name pi is no longer used automatically, but you are asked to enter a user name and a password. After a restart at the end of the initialization, a graphical user interface starts. This process takes a little longer than a minute.
When clicking on the icon, one is asked if one only wants to have the possible updates displayed or if one wants to start them directly.
The following screenshot was taken with the pre-installed program "scrot" (for screenshot).


 with 830 contacts")
