
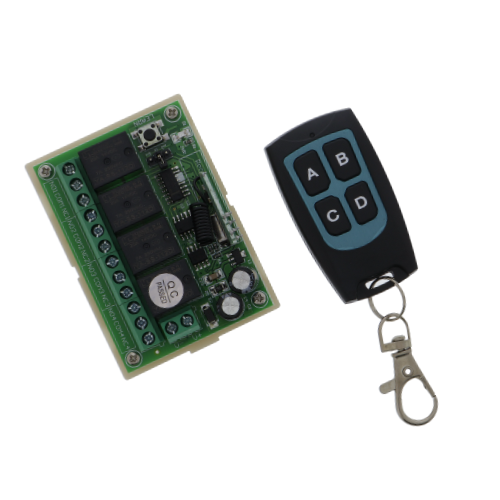
Radio remote control + receiver module, incl. 4-channel relay - 12V, 433 MHz 200m
incl. VAT plus shipping costs
Delivery time: appr. 1-3 days
- Item no: F23106301
- Weight: 0,09 kg
- Packing dimensions: 7.5 cm x 5.5 cm x 2.5 cm (L x W x H)
Overview:
- Radio remote control with 4-channel relay receiver module
- Suitable for autonomous control of electrical circuits (e.g. garage doors, windows, car doors, etc.)
- The 4 relays can be controlled separately from each other
- Simple programming via the program button on the circuit board
Instructions:
- Press the learn button, the display flashes, release your finger, press any button on the remote control, the display flashes 2x and goes out. This means that the information has been successfully saved.
- More than 12 PCS 2262 or 1527 chips can be learned with the different wireless remote control codes.
- Delete: Press the learn button for about 8 seconds, the indicator turns on and off, it means the memorized information has been removed successfully.
Programming instructions:
1. Connecting the power supply
Connect the module to a 12V DC power supply. Ensure that the polarity is correct.
As soon as the module is supplied with power, a status LED usually lights up to indicate that the module is ready for operation.
2.switch to learning mode and select mode
Press the learn button to switch the module to learning mode.
Switch to the desired mode (pin L/S1/T):
Current mode: does not connect two pins.
The relay is only active until a button is released.
On/off mode: connects pin2 and pin3 or S1 and T.
Pressing the respective button once switches the relay on, pressing it again switches it off again.
Latching mode: connects Pin1 and Pin2 or L and S1.
A relay remains active until another button is pressed.
3. Pairing the remote control
Press a button on the radio remote control that you want to control with the relay while the module is in learning mode.
The receiver module recognizes the signal and saves it.
As a rule, the module indicates that the learning process was successful by the LED lighting up briefly or going out.
4.testing
Once the radio remote control has been programmed, you can press the buttons on the remote control to activate or deactivate the corresponding relays.
Resetting the receiver:
If you want to reset the programming, press and hold the learn button for approx. 8 seconds until the LED indicator goes out.
Functionality of the output:
- Self-locking: connect JP1 to the cut-out cap.
- The cut-out cap is unoccupied, JP1 and JP2 are also not connected.
- Connect JP2 to the cut-out cap.
Specifications:
Receiver
- 1. Operating voltage: DC 12 V
- 2. Idle state: Less than 6 mA
- 3. Operating temperature: -40 °C to +80 °C
- 4. Receiver sensitivity: more than -105 dBm
- 5. Operating frequency: 433 MHz
- 6. Output voltage: DC and AC are optional
- 7. Output current: Less than 3 A
- 8. Max. Load current: 10 A
- 9. Dimensions: 72 x 52 x 26 mm
Remote control transmitter
- 1. Remote distance: 200 m
- 2. Operating voltage: DC 12 V
- 3. Frequency: 433 MHz
- 4.operating current : 13 mAh
- 5. Code type: Fixed code/learning code
- 6.Dimensions: 58 x 39 x 14 mm
Note: No instructions are supplied with this product.
Scope of delivery:
- 1x relay / receiver module
- 1x remote control


