

Controlling a RGB LED with a Raspberry Pi microcontroller
What is an RGB LED anyway?
An RGB LED is the combination of three LEDs of different colors in one package. Behind the name RGB are the colors "red", "green" and "blue". The respective LEDs can be controlled with pulse width modulation (PWM). Thus a multitude of color combinations is possible.
An RGB LED has four legs, one for each color and one common for all three colors. The longest of the four legs is the common anode (+) or cathode (-), depending on the version. The single leg next to this longest one is the connection for the red component. The green and blue parts are controlled by the legs on the other side.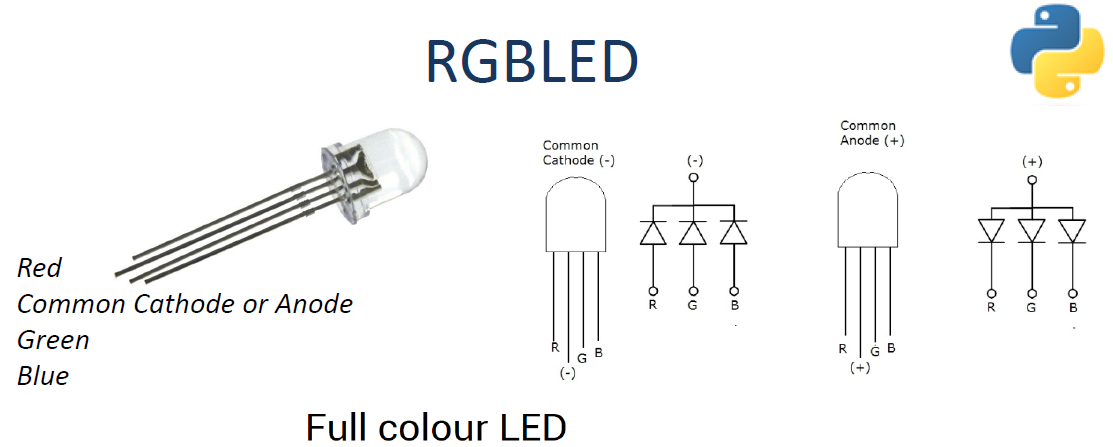
Which type of RGB-LED you have, common anode or common cathode, is not visible from the outside. Fortunately you can't damage anything by trial and error. In blocking direction the RGB-LED does not shine. Important: Also the three implemented LEDs need series resistors. If you want to do it academically, you can calculate different series resistors from the respective flux voltages. For simplicity, you can also use equal resistors between 100 and 330 Ω (Ohm).
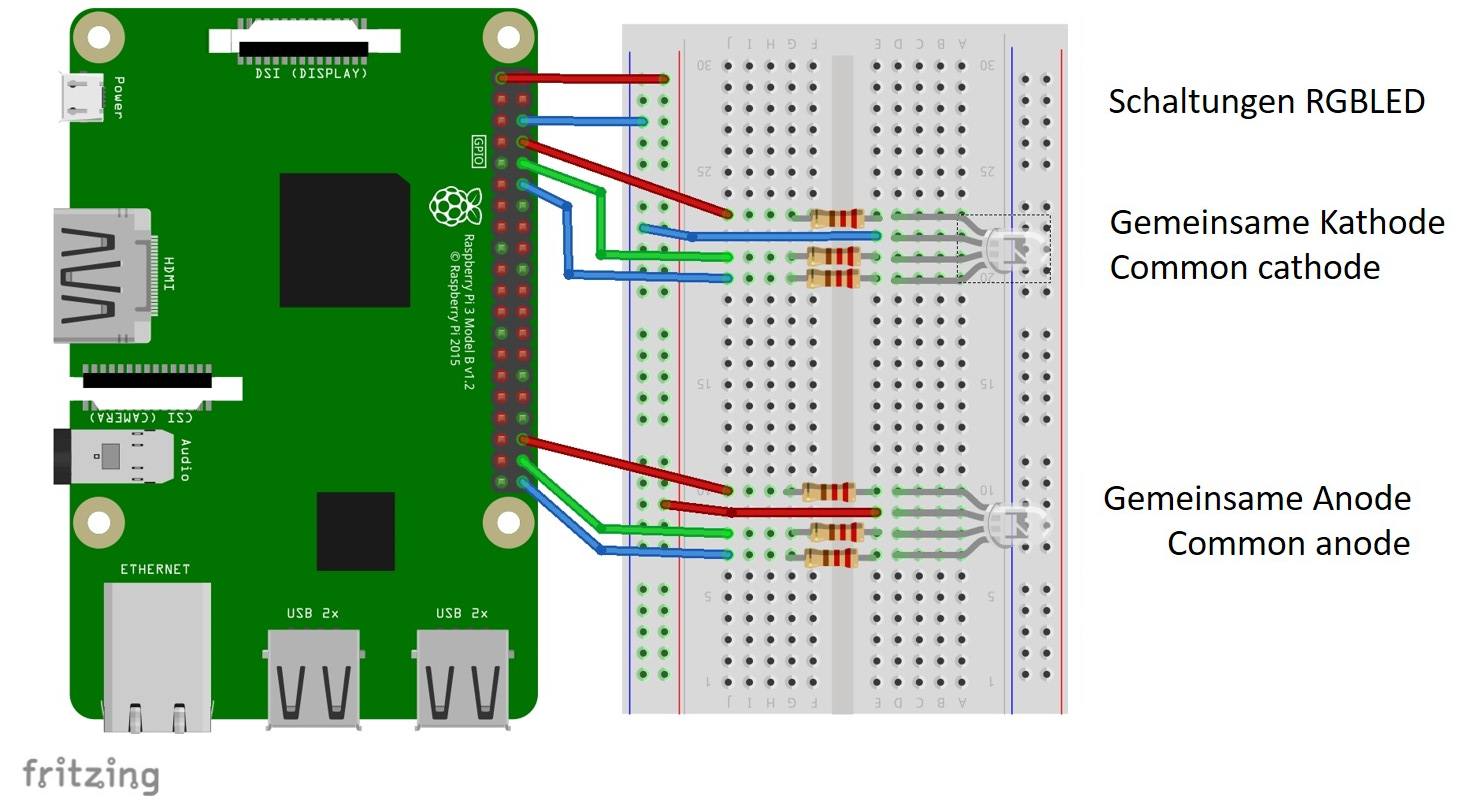
Version a: "Common cathode" - The longest leg of the LED is "-" and the three shorter legs are driven at the GPIOs with "+" (voltage).
Version b) "Common anode" - The longest leg of the LED is "+" and the three shorter legs are controlled with "-" (GND) at the GPIOs.
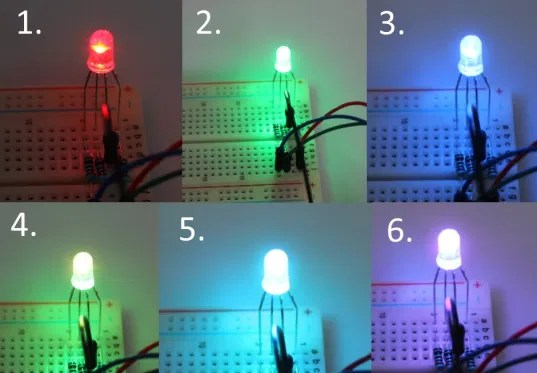
By mixing the colors, many more colors can be created. For example, driving the colors "blue" and "green" produces the color "turquoise", red and green produces yellow, red and blue produces magenta, and all three colors with equal amounts produce white.
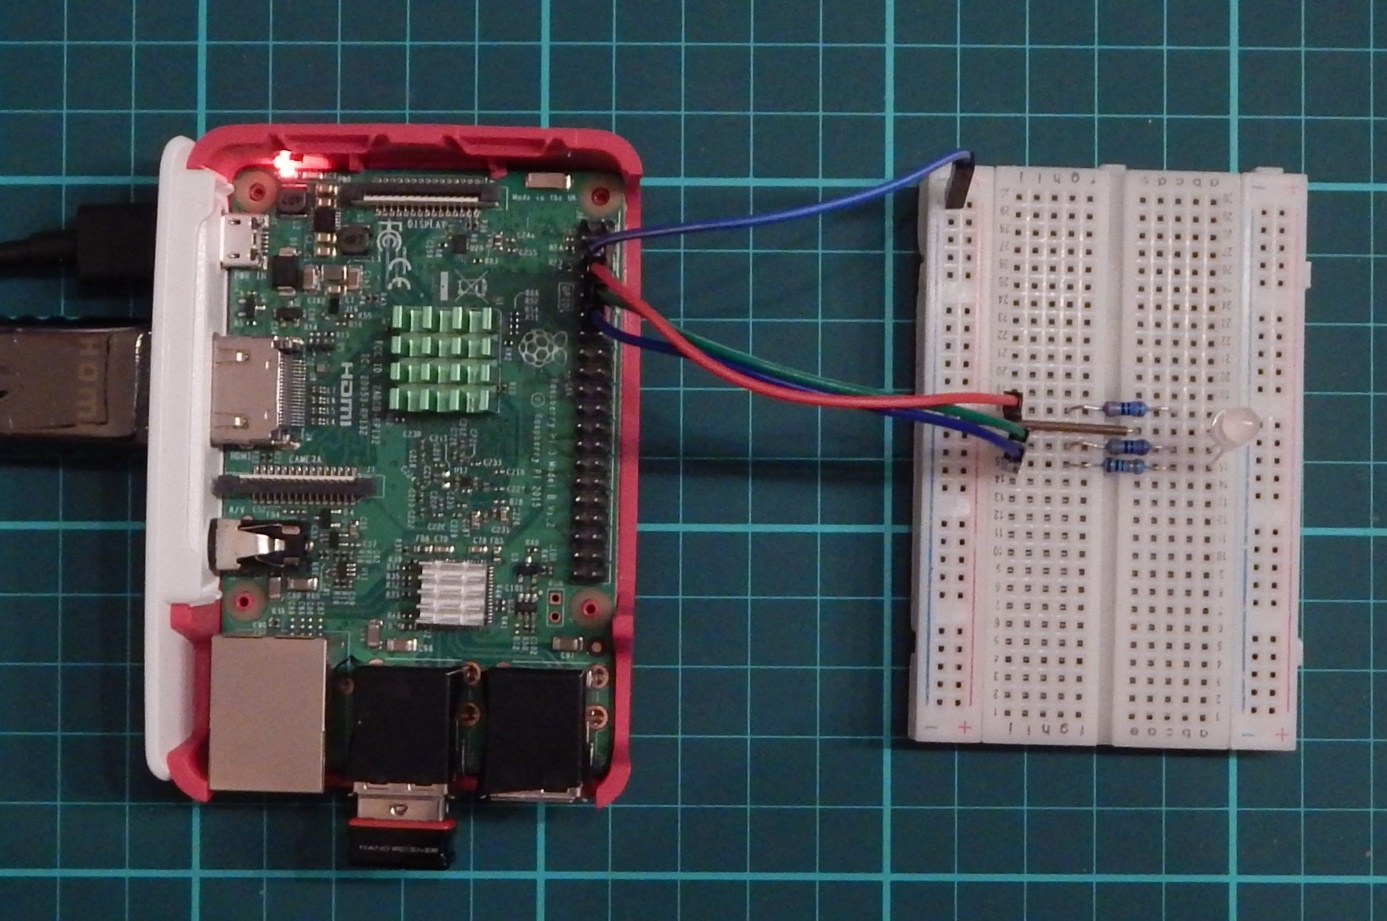
The circuit diagram: RGB LED on the Raspberry Pi
The program code: RGB LED on the Raspberry Pi
Example program for a RGB LED with common cathode:
from gpiozero import RGBLED
from time import sleep
led = RGBLED(red=14, green=15, blue=18)
duration = 2
# slowly increase intensity of all colors (5sec)
for n in range(100):
led.blue = n/100
led.red = n/100
led.green = n/100
sleep(0.05)
led.color =(0, 0, 0) # off
sleep(duration)
led.red = 1 # full red
sleep(duration)
led.red = 0.5 # half red
sleep(duration)
led.color =(1, 1, 0) # yellow
sleep(duration)
led.color =(0, 1, 0) # full green
sleep(duration)
led.color =(0, 1, 1) # cyan
sleep(duration)
led.color =(0, 0, 1) # full blue
sleep(duration)
led.color =(1, 0, 1) # magenta
sleep(duration)
led.color =(1, 1, 1) # white
sleep(duration)
led.color =(0, 0, 0) # off
sleep(duration)
Later we will see how to use three potentiometers to set the color components. But for this we need an external analog to digital converter, because the Raspberry Pi only knows digital signals - HIGH or LOW.
")


")
")